How to boot Pendrive in window at seconds

How to boot Pendrive in window
Insert a USB flash drive into a running computer.
Pendrive must be more than 8gb recommended.
Taskbar => Search <cmd > => Run as administrator
Open a Command Prompt window as an administrator.
Type
diskpart.In the new command line window that opens, to determine the USB flash drive number or drive letter, at the command prompt, type
list disk, and then click ENTER.The
list diskcommand displays all the disks on the computer. Note the drive number or drive letter of the USB flash drive.At the command prompt, type
select disk <X>, where X is the drive number or drive letter of the USB flash drive, and then click ENTER.Type
clean, and the click ENTER. This command deletes all data from the USB flash drive.To create a new primary partition on the USB flash drive, type
create partition primary, and then click ENTER.To select the partition that you just created, type
select partition 1, and then click ENTER.To format the partition, type
format fs=ntfs quick, and then click ENTER.Type
active, and then click ENTER.Type
exit, and then click ENTER.When you finish preparing your custom image, save it to the root of the USB flash drive.
Download window from official websites.
👉 👉Click Here to download👈👈
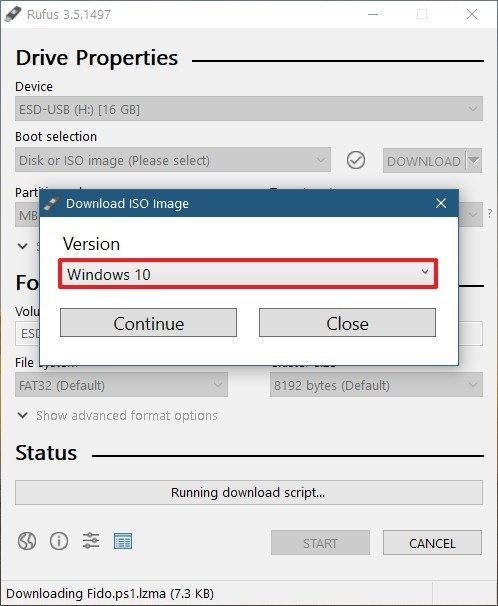
Choose your Requirements.
Download Rufus.
👉👉 Click here to download👈👈
Step 1: Open up Rufus and plug your clean USB stick into your computer.
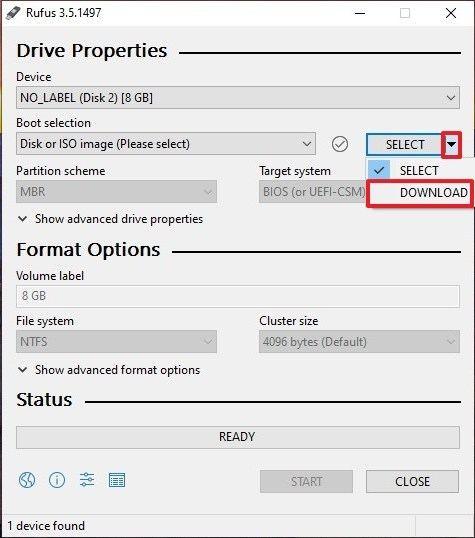
Step 2: Rufus will automatically detect your USB. Click on Device and choose the USB you want to use from the drop-down menu.
Step 3: Make sure the Boot Selection option is set to Disk or ISO image then click Select. Rufus will open a file explorer browser window; locate the ISO image you want to burn onto the USB and select it.
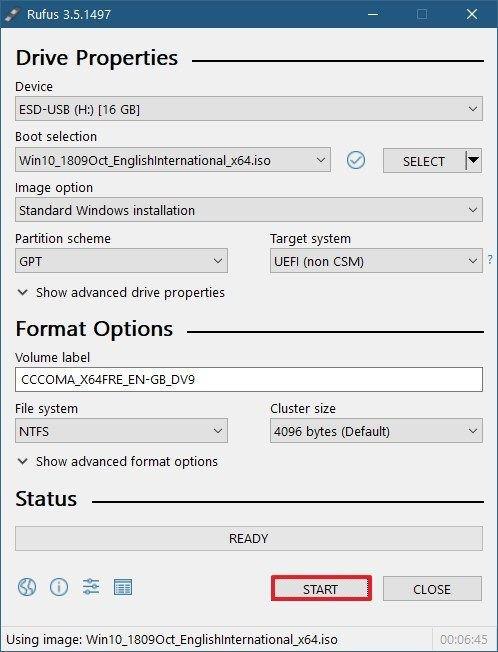
Step 4: You’ll generally want to create a Standard Windows installation, and Rufus will automatically detect the correct Partition Scheme based on your device, so keep the default settings as they are. However, you can also change these if you want.
Step 5: Give the Volume label a name of your choice, or leave it as it is, and once again leave the default settings for File system and Cluster size. Now click Start
Step 6: You’ll get a warning saying that any data on the USB will be destroyed (this is normal). Click OK and Rufus will start creating the ISO image on the USB.
Step 7: Once Rufus has finished creating the ISO image on the USB, you can close it and your bootable USB is ready to go!


Comments
Post a Comment